
Advertising disclosure
Hosting Canada is community-supported. We may earn a commission when you make a purchase through one of our links. Read Disclosure.
How to Add Robots.txt File for WordPress

Updated On
September 28, 2023

Reading Time
7 min
When you plan to build a WordPress website, it’s natural to focus on the functionality and design, spending hours choosing the right WordPress tools like a theme or plugins.
But it’s only the beginning because after you have all the assets and your website is up and running, you will need people to find it on Google and other search engines.
Since you are reading this article, you’ve probably heard that having a robots.txt file is critical for appearing in search results. Yes, it’s true, but how robots.txt WordPress settings are different from other platforms, and what are the peculiarities?
In this guide, we will tell you what robots.txt is, how it works, and what to do with it. So that you can use robots.txt with your WordPress installation and get the most out of this file. Let’s get started.
Robots.txt Basics
So, how do search engines find your website? With 200 million active websites online, it’s physically impossible to check each and every website with human efforts. That’s why they use bots to crawl the content of each website.
Then, based on these results, the content of a website is added to the search engine index, and when people look for something, they see your website (if it relevant to their request, of course) and visit it, bringing you more traffic.
Each website gets a limited crawl budget, i.e., the number of web pages that can be crawled by bots in a limited amount of time. If your website grows and is frequently updated, you would want to spend this crawling budget wisely.
Here’s when the robots.txt file comes in handy. It serves as instructions to the bots, telling them what content to crawl.
There are also pages that you wouldn’t want to be part of your crawling budget. Many pages contain sensitive information or content that should be visible to a limited audience, like login pages, dashboards, virtual classroom profiles,ect. You may want to hide this content from being accessible in search.
By specifying these forbidden places, once bots come to your website robots.txt, they have a direction on where to go and what places to avoid.
It’s worth noting that the robots.txt strategy works with “good” bots. It means that if some spam bots or other malicious ones decide to visit your website, they will ignore the rules specified in robots.txt. Yet, all known search engines use more cooperative bots so it’s still worth having one.
The structure of robots.txt
The structure of robots.txt is pretty simple and intuitive. You need to specify the bot, aka user agent, and allow/disallow certain pages to be crawled. The full list contains more than 300 bots and is available here.
You can also specify the location of your sitemap, a file with the structure of your website, to make the crawling easier.
Here is the syntax of a robots.txt file:
| User-agent | This is where you specify the user agent you are writing the directive for. Use * if you want all the bots to follow this rule. Example: User-Agent: * |
| Disallow | With this rule you specify the places where bots are not allowed to go. Example: Disallow: /privatedata/ This will block the folder privatedata from crawling |
| Allow | This directive tells bots where they are allowed to crawl. It’s often used when you block the folder but allow a file located there. Example: Allow: /privatedata/logo.png Note: this one is not supported by all the bots. You may omit this one and use “disallow” only to block certain files/folders, and other content will be available for crawling by default. |
| Sitemap | Here’s where you inform bots about the location of your sitemap, providing the path to it Example:sitemap: https://test.org/seo/sitemap.xml |
Example of how the full robots.txt file can look like:
User-agent: *
Disallow: /media/
Allow: /media/123.php
sitemap: example.org/seo/sitemap.xml
Robots.txt peculiarities for WordPress
If you have a WordPress website, you will want bots to crawl your pages, posts, and products ( if it’s an e-commerce store).
WordPress has a defined structure of folders and files, and most likely, you will not need the bots to access the default folders wp-admin and wp-includes.
The wp-admin folder, however, contains the file admin-ajax.php, which also needs to be opened.
Also, be careful with wp-content. It’s also a default folder, but your websites will be using content from its uploads subdirectories like images, videos, and other media fiels, so you will not want to block it. It’s better to block subdirectories /plugins and /themes.
As for other things to be blocked in WordPress website is readme.html because it contains sensitive information.
So, if you want to block the default folders while keeping in mind the exceptions, the rule will look as follows:
User-Agent: *
Disallow: /wp-admin/
Allow: /wp-admin/admin-ajax.php
Disallow: /wp-includes/
Disallow: /wp-content/plugins/
Disallow: /wp-content/themes/
Disallow: readme.html
sitemap: https://yourwebsite.com/sitemapname.xml
or:
User-Agent: *
Disallow: /wp-admin/
Allow: /wp-admin/admin-ajax.php
Disallow: /wp-includes/
Disallow: /wp-content/
Allow: /wp-content/uploads/
Disallow: readme.html
sitemap: https://yourwebsite.com/sitemapname.xml
Don’t forget to replace the sitemap value with the actual information from your website.
How to Add Robots.txt for WordPress
To start with, where is robots.txt in WordPress?
When you install a fresh WordPress installation, you cannot see robots.txt in your website directory. But don’t worry; your website is still being accessed and indexed by bots.
By default, when you create a first page or a post, WordPress creates a virtual robots.txt file with the default one, which blocks some bad bots and the wp-admin folder.
The default virtual WordPress robots.txt may look as follows:
User-agent: *
Disallow: /wp-admin/
Allow: /wp-admin/admin-ajax.php
It’s better to create your own robots.txt file, though, because you will not be able to modify the virtual one if you need to add your sitemap or block access to certain parts of your WordPress website.
So there are two options: create your own robots.txt manually through your WordPress hosting provider or use a plugin.
There’s no need to look for a specific WordPress robots plugin because SEO plugins like Yoast SEO, Rankmath, or any other free or paid option will have the option to modify robots.txt inside the admin dashboard.
Here’s the first way:
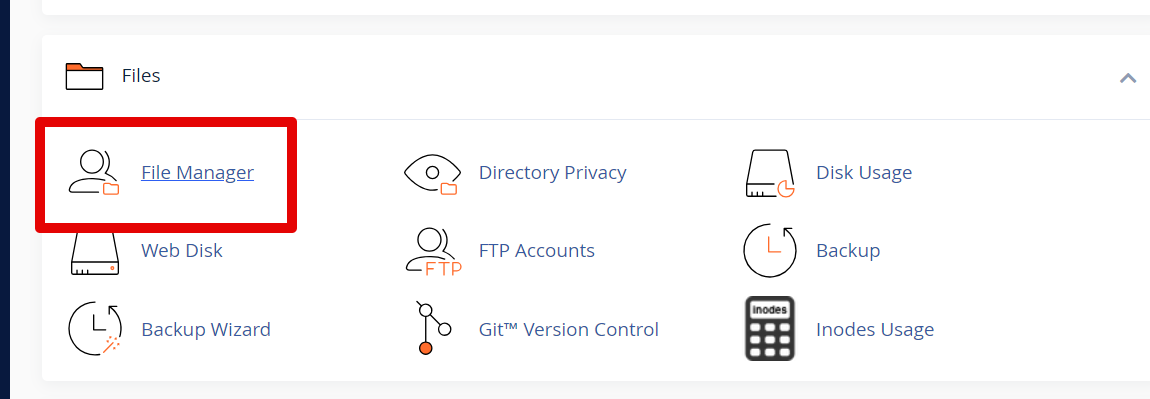
- Navigate to your File Manager ( if you use a cPanel host, you can locate it in cPanel> File Manager).
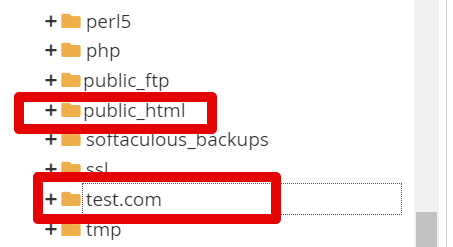
- Locate your file directory and open it with a click ( it’s public_html for the primary domain in the cPanel, or a folder with the name of the website, if it’s an addon one. In our case, it’s test.com)
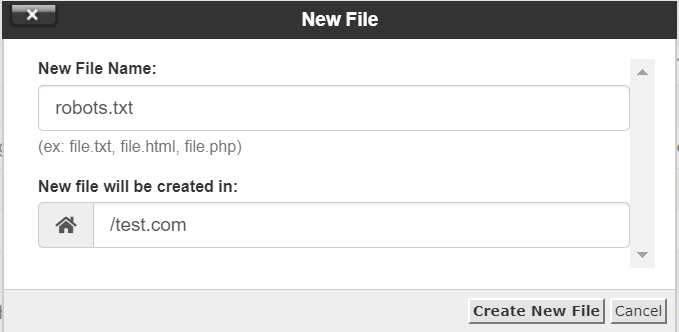
- Once there, press + File option to create a new file.

- Type in the name robots.txt.
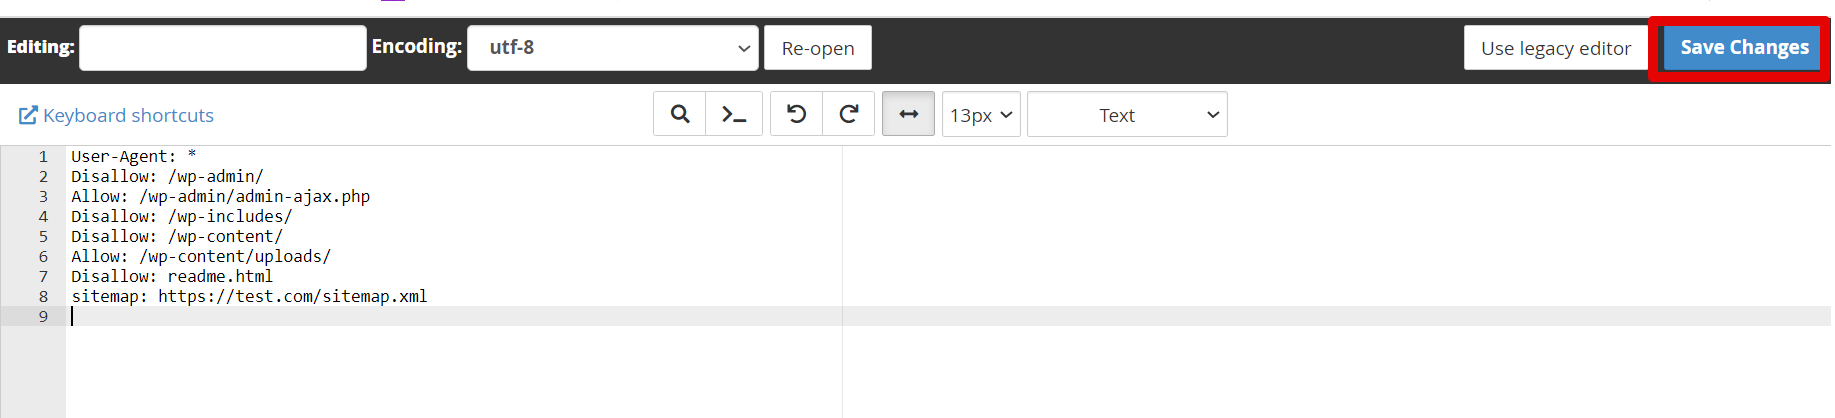
- Now, locate the file in the list and choose the edit option
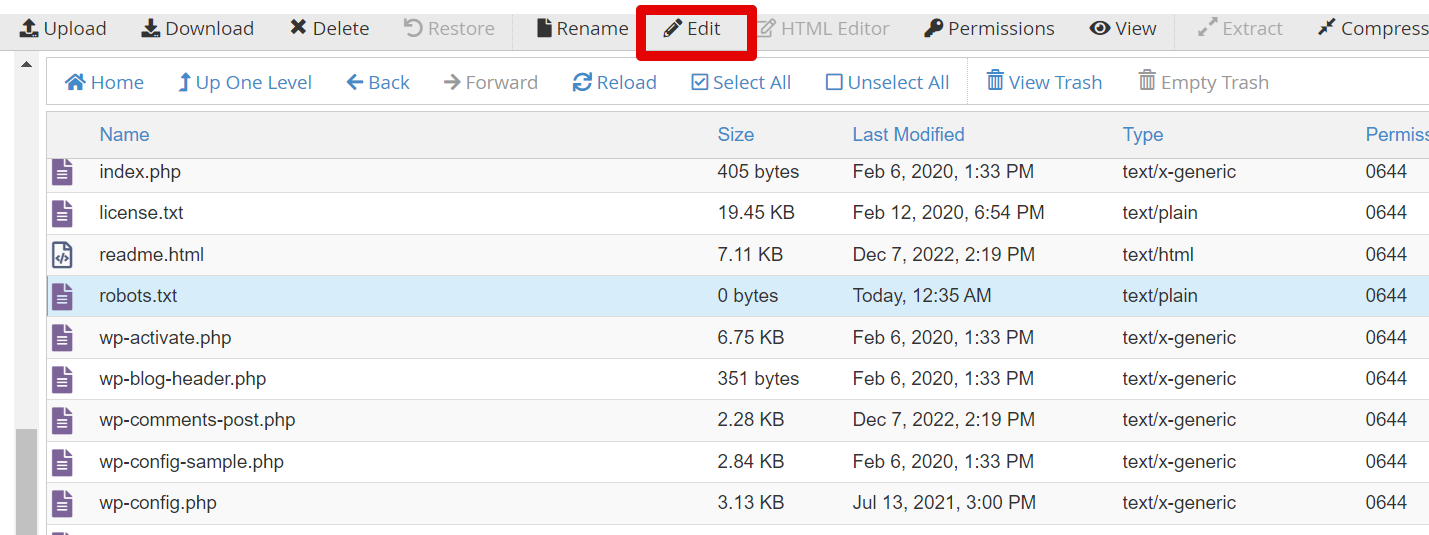
- Insert your directives and press Save Сhanges ( we will be adding the default directive we were talking about)
- Well done!
If you use managed WordPress hosting, you will not have the cPanel.
In this case, if you have access to the File Manager, the algorithm of adding WordPress robots.txt will be very similar despite of the different interface. Or you can go with the WordPress SEO plugin.
The second way is simpler because all you need is to log in to your WordPress dashboard, install a plugin (if you don’t have one yet), and find the plugin settings.
Let’s see how using Rankmath SEO:
- Locate the Rankmath SEO plugin ( it’s on the upper menu once you log in to your WordPress).

or
Locate Rankmath in the side WordPress panel and choose General settings (it’s faster)
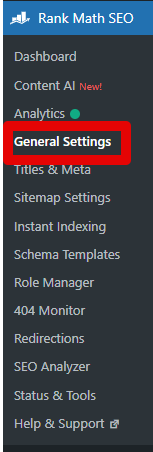
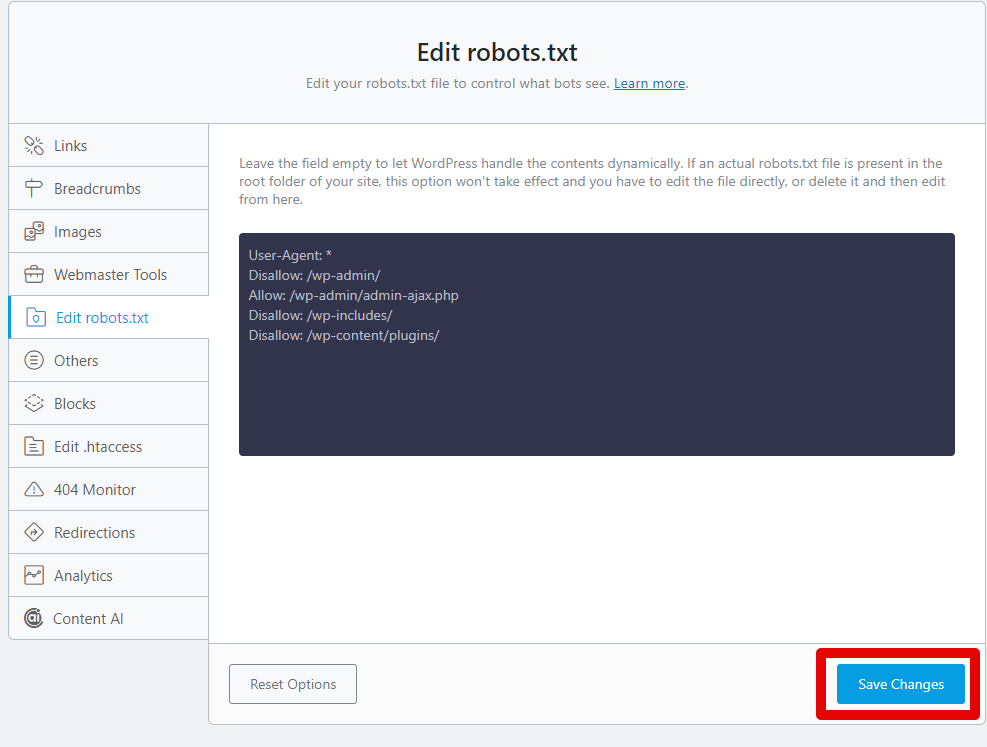
- Go to Edit robots.txt section and insert the rules you want. Don’t forget to save changes, and you are good to go.
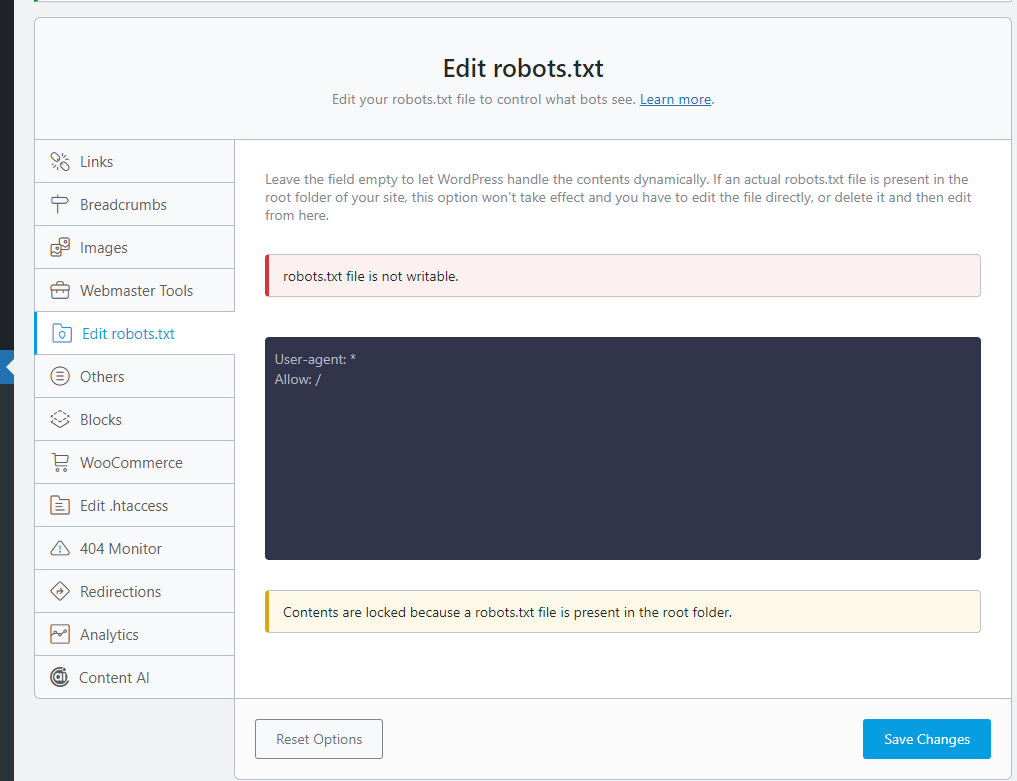
Note: If you have created the robots.txt manually, the editing option in Rankmath is disabled to avoid interfering with the settings.
Wrap-up
When working with robots.txt you need to be careful to avoid any potential issues with SEO rankings. Like, when you specify the incorrect folder with the disallow directive, it will mean these pages will not likely be indexed.
If you do not plan to add custom rules, the default WordPress setup can do the work for you. Also, if you occasionally block some bot, you may get use of the plugins we mentioned before
Now that you know how to create and use robots.txt for WordPress, you can go further and boost your SEO efforts with more tools, like image optimization or backlinking.