
Advertising disclosure
Hosting Canada is community-supported. We may earn a commission when you make a purchase through one of our links. Read Disclosure.
How to Fix DNS Server is Not Responding


![]() If you’re unfamiliar with what DNS is, it stands for Domain Name System, and it’s what ties the whole internet together. Without DNS, no computer would be able to find any website, as it acts as the directory for everything.
If you’re unfamiliar with what DNS is, it stands for Domain Name System, and it’s what ties the whole internet together. Without DNS, no computer would be able to find any website, as it acts as the directory for everything.
Unfortunately, sometimes you might have issues reaching the DNS server, and that can cause a lot of havoc.
It can also be problematic because sometimes it might not be an internet-wide issue but only apply to one or two sites, meaning that you aren’t sure if the problem is you or the website itself.
Thankfully, there are several solutions you can try to fix the issue. So, if you’re wondering, “What does DNS server not responding mean?” we’ve got you.
Top Fixes When the DNS server is not responding
Here are several possible fixes to try when you’re having DNS problems. Good luck!
#1 Router Restart
![]() One of the first steps you should try is restarting your router since that can often solve any DNS routing issues.
One of the first steps you should try is restarting your router since that can often solve any DNS routing issues.
This is mostly due to the fact that, over time, routers tend to get clogged up with information unless they get a restart to essentially flush the memory, which means the router is too disoriented to connect to Domain Name System.
Before reaching for the power button though, try and reset your router from its interface:
- You can access it by typing and entering 192.168.1.1 into the URL bar of your browser. This will take you to the admin page of your router and will ask for a password before letting you into the full admin panel.
- From there, you’ll want to look for a “reset router” button or link to click
- If you find that this doesn’t solve your issue, then a hard reboot using the power button, or preferably, disconnecting it from the power, could help. Just keep in mind to keep the router disconnected for at least 20 or 30 seconds; that way you make sure no residual charge stays in there and maintains the issue.
#2 Use A Different Browser
 Another possible easy solution is to try a different browser.
Most people tend to use Chrome or Firefox, so we’d suggest trying Vivaldi or Opera.
Keep in mind, you must try accessing the same website you did on the web browser to see if it’s a browser issue.
If the DNS issue remains, then it’s probably not a browser problem. If it does, then you might need to update the malfunctioning browser or just do a clean reinstall of it.
Also, while we’re talking about browsers, you could also give quality VPNs a shot. Since some VPNs will reroute you or use their own DNS servers, this might help resolve the issue for you, at least temporarily, until you find a long-term solution.
#3 Disable Secondary Connections
 If you’re connected to several different devices, especially with Ethernet, this can sometimes cause an issue. In a sense, the signal gets mixed up and lost, and that can often lead to things such as DNS errors.
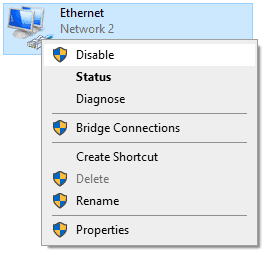
As such, you might have to disable secondary connections by:
- Go to the search bar in Windows and type in ‘Network Connection’ or find it through the control panel
- Within that list, find the primary way you connect to the internet, usually some form of an Ethernet connection, and set that as the primary.
- If that doesn’t work, try right-clicking all the other connections and clicking on ‘disable’ in the new popup
- Another thing you can try doing is using a VPS host to route your connection through. Much like a good VPN, it can also allow you to bypass a specific issue with your connection, although it’s slightly more involved than a VPN. It does give you a bit more granular control, though, and some can be used as online backup storage, so it’s a great solution all around.
#4 Start Your Computer in Safe Mode
Sometimes issues with your operating system can be the culprit, even giving you the error message for “DNS server not responding.”
Starting your computer in safe mode (which runs Windows on limited resources and the bare essentials) can help indicate if you’re dealing with an OS issue. If the problem is resolved in safe mode, you know it’s potentially your operating system.
There are multiple methods to boot in Safe Mode with Windows, but here is one method to try:
- Push the Windows key and the I key at the same time to open Settings, or simply navigate to it from your start menu
- Go to System
- Scroll down to find Recovery
- Select Advanced Startup and then click Restart Now

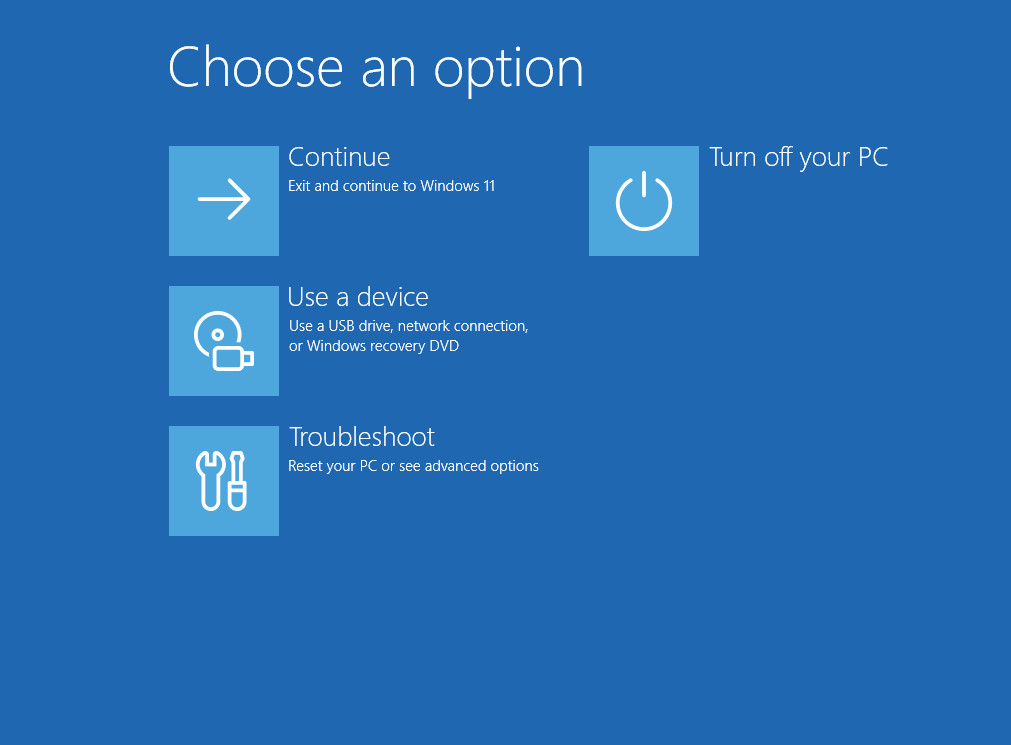
- This will take you to the blue screen with options such as Continue, Use a Device, and Troubleshoot. Select Troubleshoot
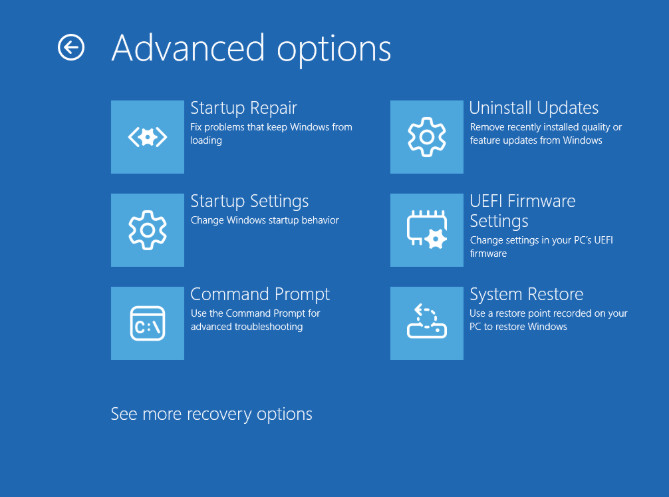
- On the next blue screen, click Advanced options
- Then select Startup Settings
- The next screen will have various startup setting options. You’ll want to press the 5 key or the F5 key to start Safe Mode with Networking.
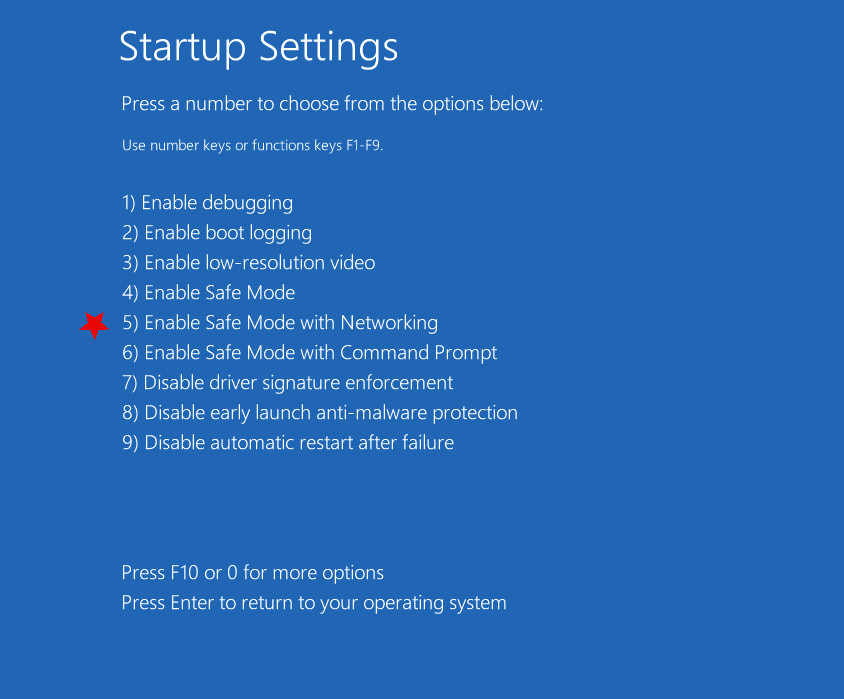
- From there, see if websites start to load normally
Macs have a different process:
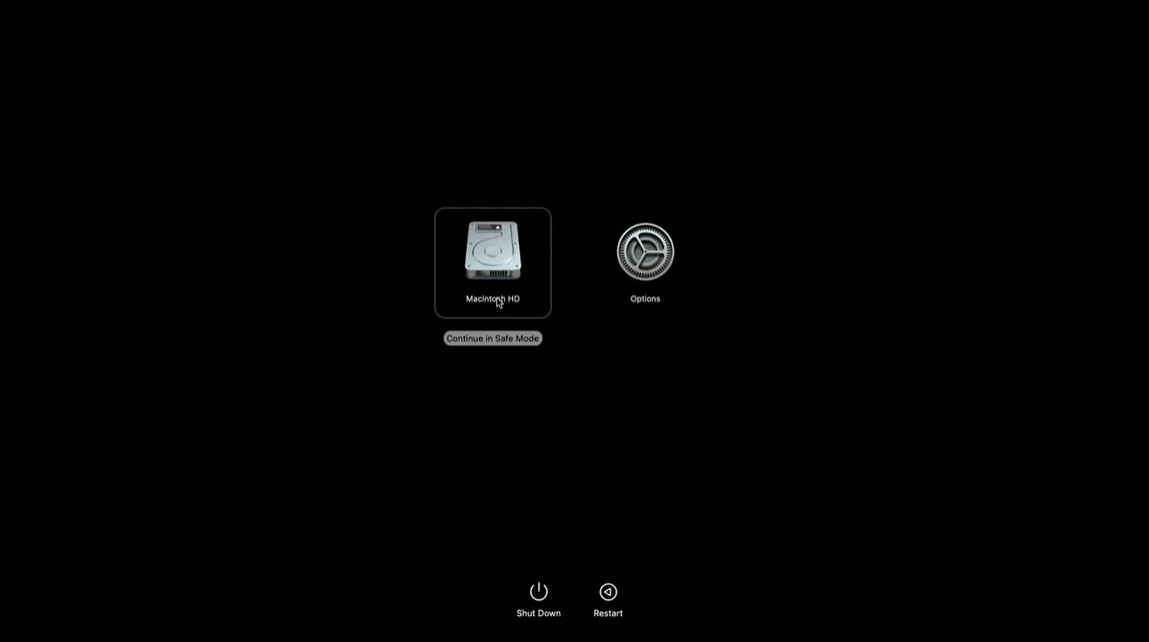
For Macs with Apple Silicon:
- Go to the Apple menu
- Choose Shut Down
- Make sure your Mac is completely shut down and there are no lights or screens on
- Push and hold the power button until you see “Loading startup options”
- Choose a volume
For Intel-based Macs:
- Turn off your Mac
- Turn your Mac back on and immediately push and hold Shift until you see the login window appear
- Input your login credentials
- You may be asked to log in twice. Either in the first log in or second log in window, you’ll see the option to Safe Boot, at which point you simply select it to boot in safe mode
- Try accessing a website to see if it works normally
#5 Disable Firewall and Antivirus Temporarily
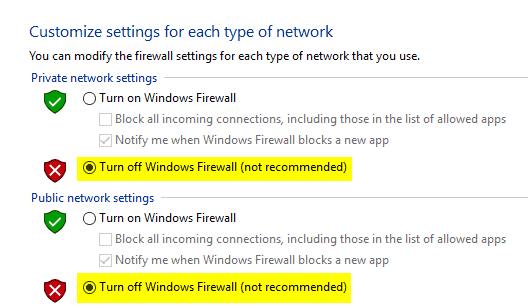 While disabling your firewall or antivirus is generally a terrible idea, it can sometimes be helpful in trying to diagnose a DNS error.
This is because both these pieces of software interact and try to protect you from malicious access, especially from external sources coming from the internet.
As such, they may sometimes interfere with the normal functioning of your internet.
How you switch each of these types of programs varies from software to software, but you can generally find the settings if you do a quick search for them.
First, you should try switching your antivirus first and see if that fixes the issue. If not, try the firewall as well and see if that was the issue. If the DNS error is fixed when you switch one of the programs off, then those are probably the issue, and you’re going to need to replace them.
6#: Disable Peer-to-Peer on Windows
Peer-to-peer (or P2P) is a decentralized system that lets computers share directly with each other, rather than sharing/downloading something from a single main server. It can greatly improve efficiency and help conserve things like download bandwidth.
However, it can occasionally interfere with DNS processes. Disabling P2P is a way to check. Note, this is really only something that would happen with Windows devices, not macOS.
For Windows 11, the P2P feature is called Delivery Optimization.
Here’s how to disable it:
- Go to the Start menu and open Settings
- Go to Windows Update
- Select Advanced Options
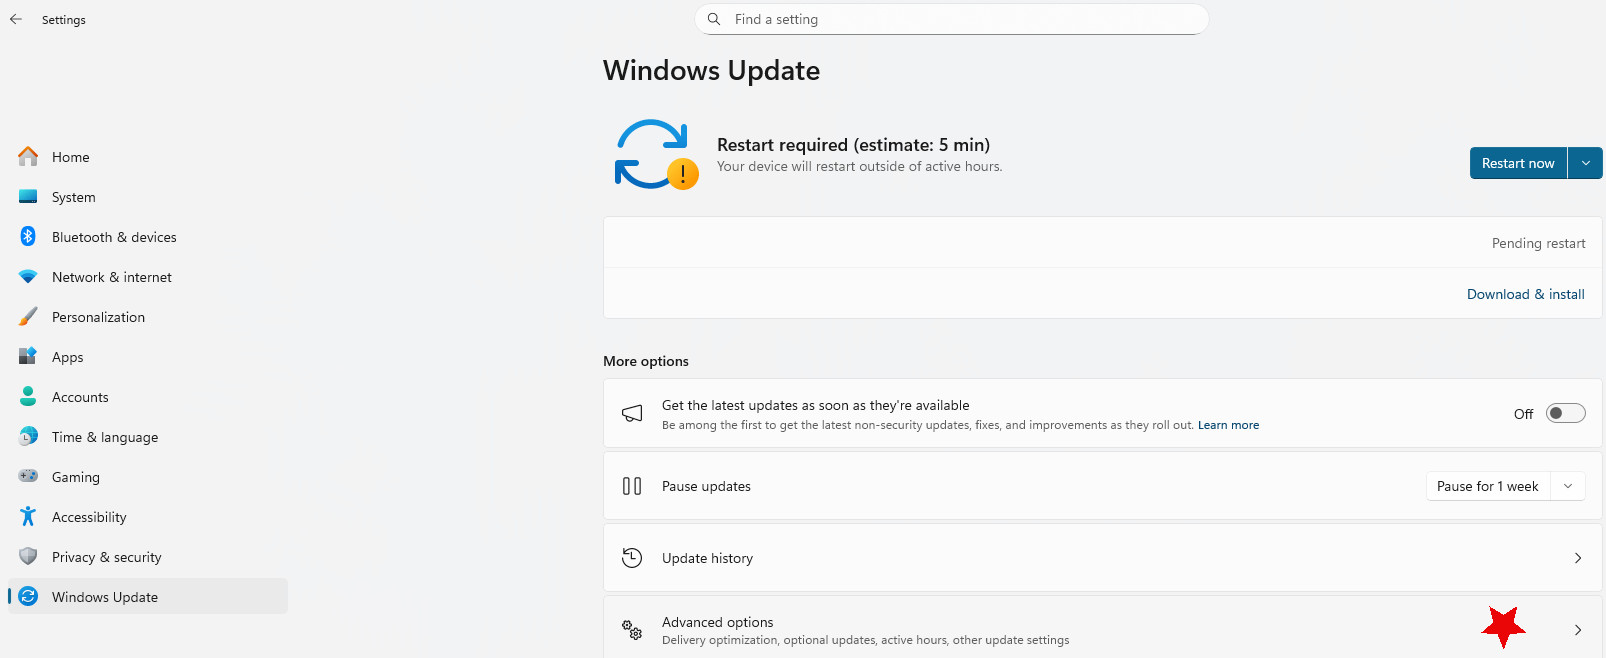
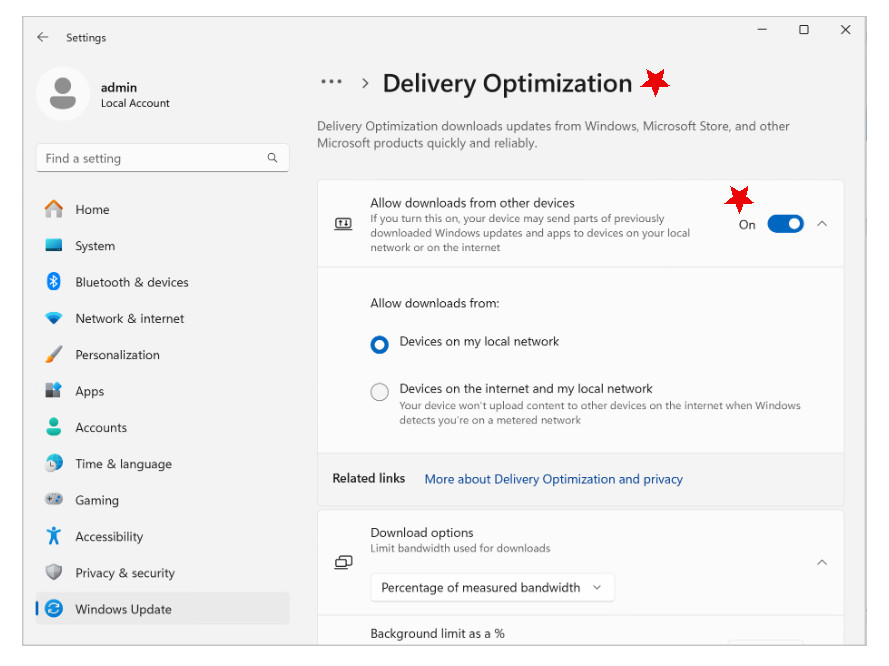
- Find Delivery Optimization
- Toggle off “Allow downloads from other devices”
#7 Update Your Drivers
While the operating system is essentially the framework of your computer, drivers are the nuts and bolts of how things run under the hood. As such, drivers are essential for things running smoothly, and when they aren’t updated, they can cause issues like these.

This is especially the case when network drivers for your ethernet port are not updated or are interacting weirdly with another device that doesn’t have an updated driver. It can be a bit of a pain to diagnose this issue, but thankfully there is a handy solution in the form of Snappy Driver Installer (SDI) and Driver Easy.
Both of these programs are great for not only checking if your drivers are up to date but also to help you quickly update them if they are out of date.
#8 Disable IPv6
 You might have heard of the terms IPv4 and IPv6 before but not really be familiar with what they are.
Well, the IP part of those names means ‘Internet Protocol’ and is essentially the framework that the world uses for assigning email addresses or IPs.
For example, the number we gave you above, 192.168.1.1 is an IP, although specific for routers. So essentially, think of IP as the telephone network and IPv4 and IPv6 as the numbers listed in the yellow pages.
Now, originally the world was run on IPv4, but at some point we started running out of numbers to give to people (after all, there are billions of devices online).
As such, IPv6 was introduced to extend the number of . . . well, numbers, that we have to work with, so basically adding a few more pages to those yellow pages.
The problem is, sometimes IPv6 can interfere with the proper working of your internet, so disabling it might actually help alleviate the problem.
To disable it:
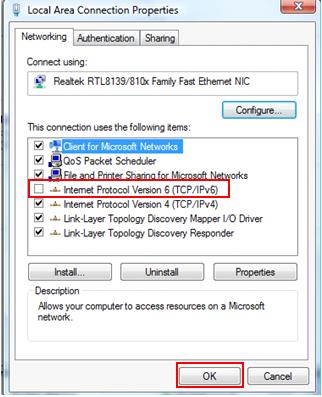
- Go to the “Network Connections” panel again
- Right-click your primary connection
- Choose “Properties”
- In the window, look for the ‘Networks’ tab, and in that look near the bottom for something called “Internet Protocol Version 6 (TCP/IPv6)” and uncheck it. Once you do, be sure to close and open the browser and revisit the site to see if it works
#9: Reset Your IP
Resetting your IP may help your “DNS server not responding” problem. Here’s what to do:
For Windows:
- Type “cmd” into your taskbar’s search field, then open up the Command Prompt application
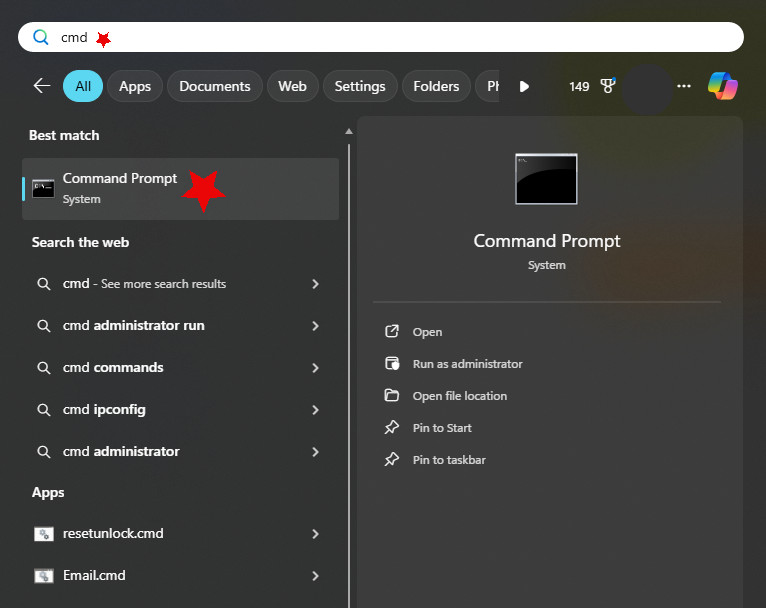
- A window will pop up, at which point you’ll want to input “ipconfig/flushdns” but without the quotations. Then press
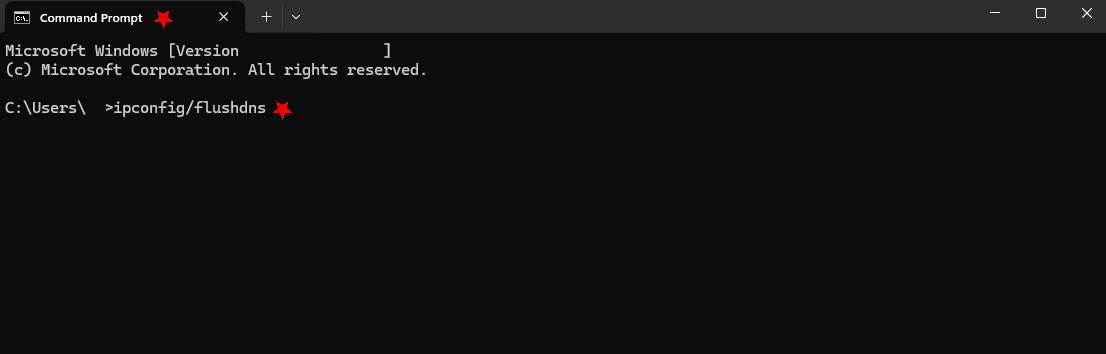
- The cache will be cleared and let you know it was successful. At this point, do the same thing but input different commands. Here are three more to do, one-by-one, leaving out the quotes again:
“ipconfig /release” (this drops your current IP address)
“ipconfig /renew” (this makes a new IP request from your router)
“ipconfig /registerdns” (this uses the current hostname and IP address to update the DNS server)
For Macs:
- Go to the Apple menu
- Navigate to System Preferences (also might be called System Settings)
- Choose Network
- Select the connection you want to change (ex. Wi-Fi)
- Go to Advanced (may also be called Details)
- Choose the TCP/IP tab
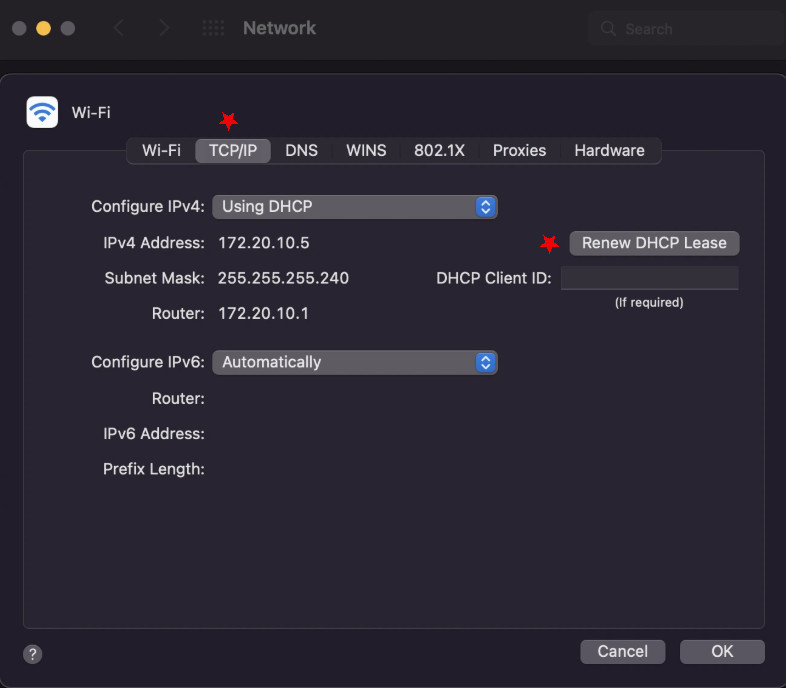
- Select Renew Lease, to automatically be assigned a new IP, or you can choose the dropdown menu next to Configure IPv6 and select “manually,” and input your new IP address manually, assuming you have access to one
To actually flush your Mac (this is more involved):
- Go to Launchpad and input “Terminal” into the search bar
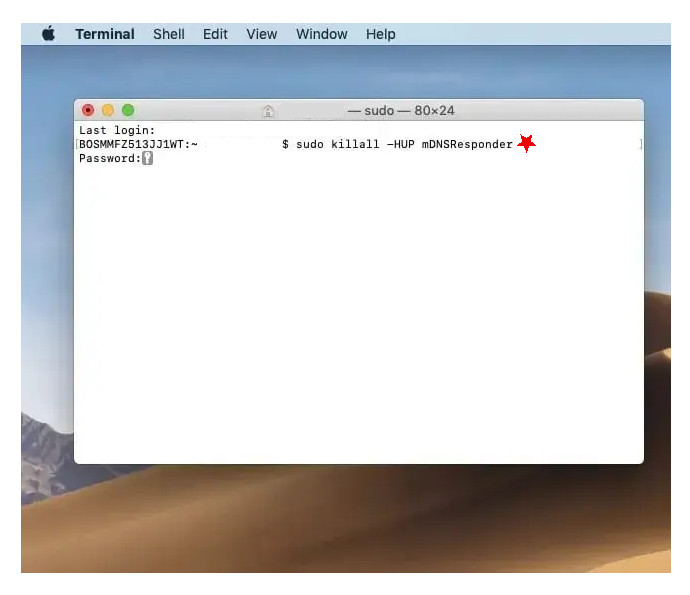
- Depending on the version your software is, you’ll input the following into Terminal, leaving out the quotations:
- For Lion, Mountain Lion, Mavericks, El Capitan, Sierra, High Sierra, and Mojave: “sudo killall -HUP mDNSResponder”
- For Sonoma, Ventura & Monterey: “sudo dscacheutil -flushcache; sudo killall -HUP mDNSResponder”
- For Tiger: “lookupd -flushcache”
- For Yosemite: “sudo discoveryutil mdnsflushcache”
- Push Enter
- If prompted, input your password and push Enter again
- You should get a confirmation message that the system reset your DNS cache
#10 Change DNS Server
 If all else fails, there is one final thing you can do to try and fix the issue, which is to change the DNS server.
So what is a DNS server?
Well, it’s essentially the yellow pages that tell which address goes with which number and this is often one of the biggest issues when it comes to DNS errors.
Thankfully, you can change the DNS server and hope that fixes the issue, and it’s relatively straightforward if you were able to follow the steps above.
All you need to do is:
- Go to “Network Connections” again
- Right-click on your primary connection
- Pick properties
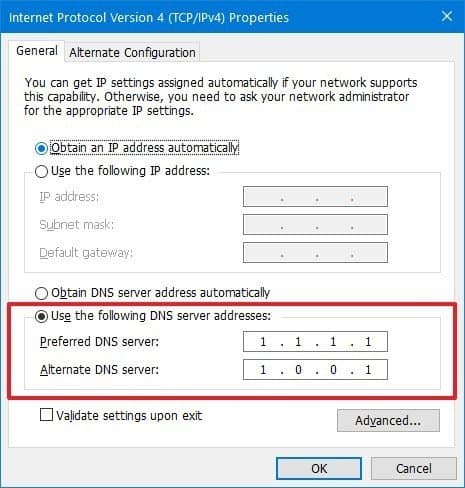
- In the “Networks” tab, look for “Internet Protocol Version 4 (TCP/IPv4) or IPv6”, click on it, and then click on “Properties” below it. If you would like to learn the differences between TCP and UCP protocols, check out our guide.
- In the new pop-up window, go to the “General” tab, and there you’ll find a place for the DNS server address
- For the preferred DNS use 8.8.8 and for the alternate, use 8.8.4.4. Both of these are Google’s DNS servers, so that should hopefully fix your issue!
#11: Connect Using a Different Device
If it’s not looking like your browser is the culprit for when the DNS server is not responding, you can always try connecting to a different device or computer to see if you’re still getting “the DNS server is not responding” error. You can also try using your mobile data to connect as well. This can help narrow down if the issue is with you or the actual site.