Advertising disclosure
Hosting Canada is community-supported. We may earn a commission when you make a purchase through one of our links. Read Disclosure.
How to Switch Web Hosts for Your WordPress Site


When you decide to switch from your current web hosting service, it is usually after you’re exhausted your patience and all available avenues to make your ongoing system work.
Why?
Because switching hosting providers is often nerve-racking and fraught with error, even after you’ve done your homework and decided on a platform that suits your needs. Whether you’re looking to switch to cheap web hosting or upgrade to a more robust solution, most people recoil at the inconvenience and the abundant opportunity for glitches that switching brings.
To minimize stress and mistakes, we have provided this guide to make the process as seamless and secure as possible.
Let’s get rolling!
Our Recommendation — Ask Your Hosting Company!
This guide is motivated by the drive to make your migration experience simple and easy. In that regard, a high-quality host will further alleviate your burden by handling all your migrations.
HostPapa, which happens to be one of our top partners, provides an entirely hands-off migration service so that you don’t have to sweat your site migration. All you have to do is provide them your login details. Check out our HostPapa review
Assemble The Resources You’ll Need
You need to get all your ducks in a row. Therefore, collect all you need for the switch. As the saying goes, it is better to have it and not need it than to need it and not have it.
- Ensure you have access to both the old and new hosting accounts — Some of these changes will require elevated privileges, so ensure that you not only have the right login credentials but administrative access as well.
- Ensure you have access to your database — The bells and whistles might change on the new platform, but your data remains as relevant as ever. Just as it is necessary to have the login credentials to access your accounts, you also need these to access your database.
- Utilize an FTP client. — You’ll need an FTP client to move data between servers. There are great options available to choose from, such as Filezilla.
- Obtain a reliable text editor. — You’ll need a good text editor since you’ll be doing a lot of modifications. Notepad++ is an excellent example.
Once you’ve gathered all the tools and assets required, it’s time to commence. Take a deep breath, and let’s dive into the first step of the process.
A. A Step-By-Step Process on Manually Moving Your Site from One Host to Another
This section shows how to do the switch manually. If you’re looking for a process that uses the WordPress plugin, then scroll further down to that section.
1. First, Back-Up Your Files
Nothing is foolproof, so the first thing you should do before migrating is to back up all your files. Therefore, in the case of any unfortunate mishap or mistake, you can restore your system from the backed-up data.
This aspect of the process will probably take the longest since it’s going to transfer both system files and all your files. We recommend using an FTP or SFTP system for this. FTP stands for file transfer protocol, and it allows you to access and transfer files over a computer network.
Launch the FTP client and enter the credentials to access your FTP server. Navigate to the root directory of your WordPress website, especially if it isn’t configured as your landing page by default.
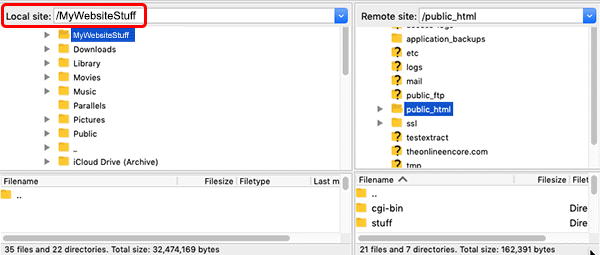
Select all the files. Systems usually have hidden files to protect users from accidentally or even intentional deleting and modifying them. One such file is the .htaccess file. Instruct the FTP client to show all hidden files to make sure you don’t omit any.
For example, if you’re using FileZilla, you can do this via Server > Force showing hidden files.
After marking the selected files, copy them to a location you’ve designated on your computer. The copying process might take a while, depending on the size of your site.
2. Export the MySQL Database
The next phase of the migration process involves exporting your entire database. Although there are several tools available, I highly recommend using phpMyAdmin for this task because it is simple, user-friendly, and intuitive.
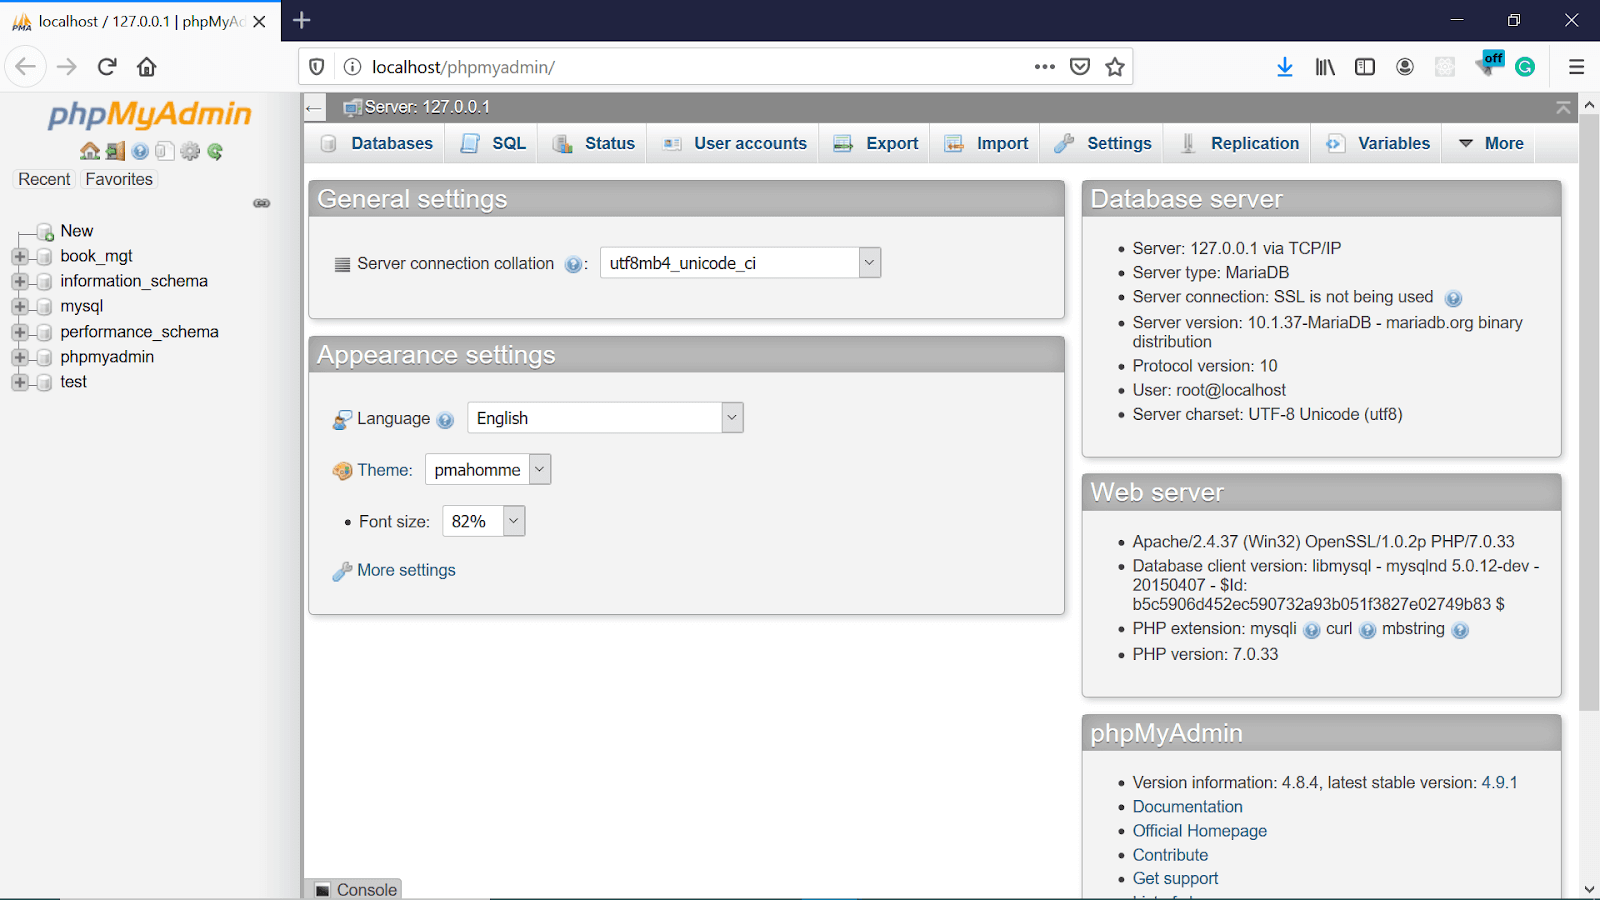
Listed on the left panel are the available databases. Simply select the one you wish to export. If you’re unsure which one exactly, check the wp-config.php file of your current website. This file provides the base configuration details for your WordPress website.
Check the entry where the Database name is defined. It should look like this:

To be listed in place of the ‘database_name_here’ placeholder is the actual database name..
When done, proceed to the export tab:
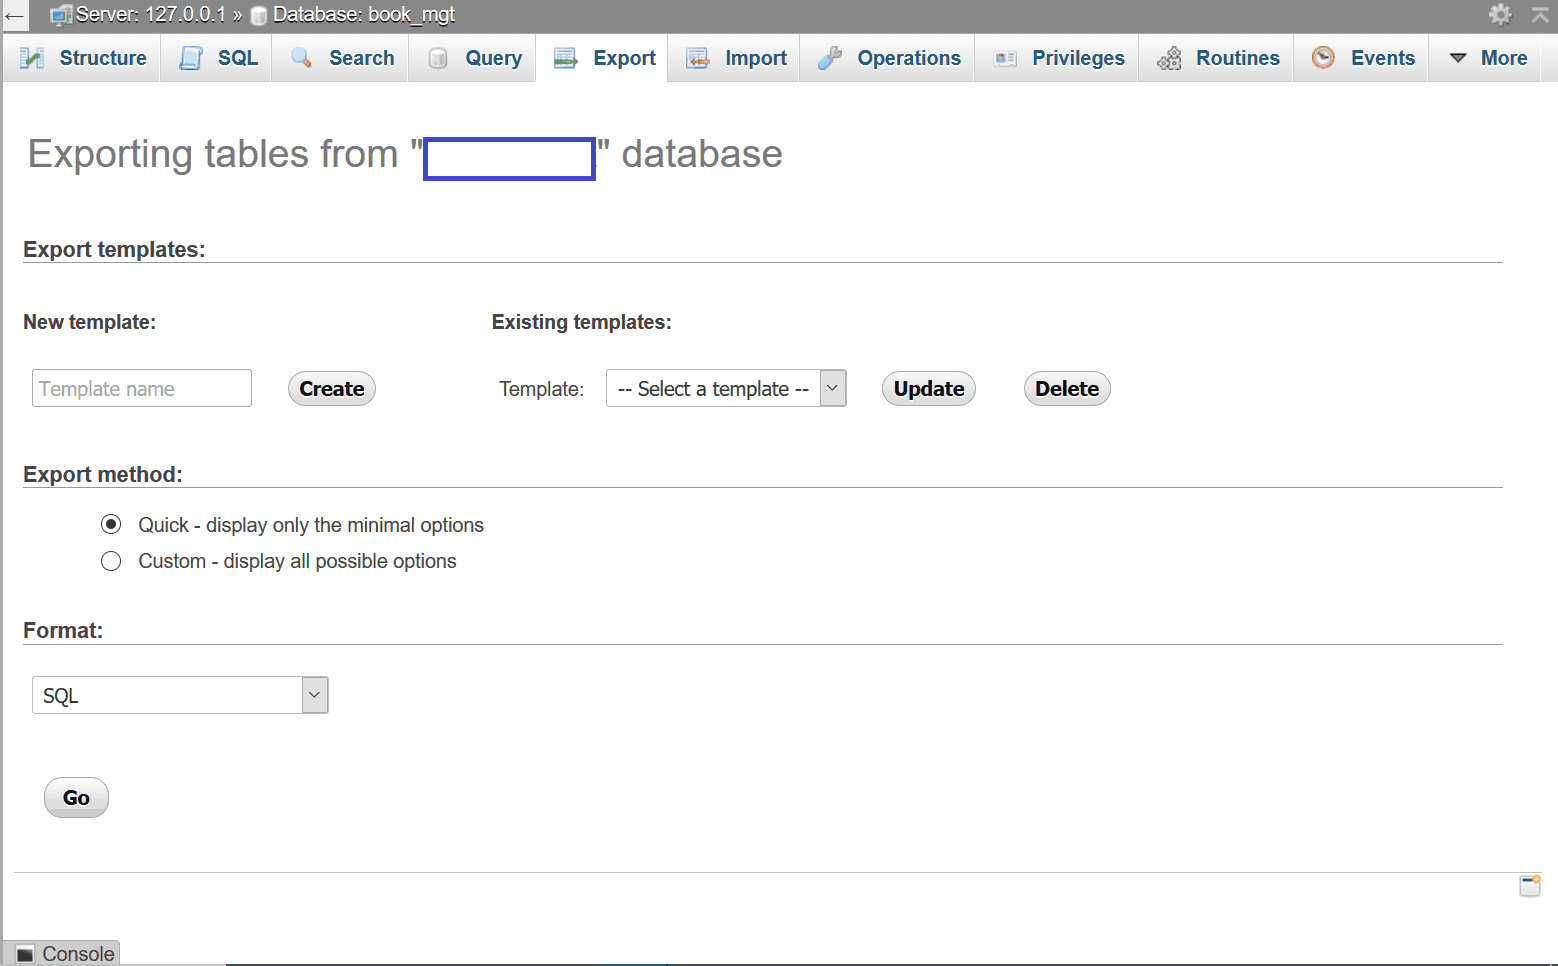
There are two Export methods available. Choose Custom.
Below is a list of the menu options under Custom, explaining the optimal choices to make:
- ☑️ Format — Leave it on the default SQL option.
☑️ Tables — The table(s) to be exported should be marked.
☑️ Output — To make the download faster, set Compression to either the zipped or gzipped.
☑️ Format-specific options — Leave the default option.
☑️ Object creation options — Select the Add DROP TABLE / VIEW / PROCEDURE / FUNCTION / EVENT / TRIGGER
☑️ Data creation options — Leave the default option.
After completing all the selections, click on the Go button at the bottom of the form.
This action should export your data as a file download. Save in an easily accessible location on your computer and proceed to the next step.
3. At Your New Host, Create a Database
You need to import your database into your new host platform. But first, you need to create a home on the new system for the database. Every host is a bit peculiar, but find the section on your host that deals with databases and do the following:
- ☑️ Create a new database.
☑️ Create a database user and grant the user full administrative privileges.
☑️ Secure and store the user’s password in a safe place.
4. Edit System Configuration File (wp-config.php)
We will be using the wp-config.php file once again. It is an important file that contains your site’s base configuration, handling database connectivity, and communication.
Make a copy of this file and store it somewhere safe. Then open the original file in your text editor and make the following changes:
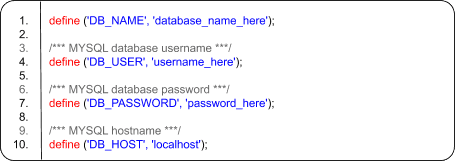
Replace database_name_here, username_here, and password_here with the actual information for your current host’s database name, username, and password, respectively.
In place of localhost, enter the name of the MySQL server, or leave it as localhost if that is the setting allowed by your hosting provider.
When you have completed the necessary modifications, save the changes.
5. Upload Your Files to the New Host
Last time, you downloaded your files from your old hosting service. But now we’ll reverse the process and instead start uploading those files to your new host. It might take a considerable amount of time to complete, so it is advised you start the process while you continue with other facets of the migration.
Start your FTP client, but this time connect to the new server. This connection requires some changes to reflect this reality by entering the IP address of this new server instead of the former one into the FTP client. You can usually find this new IP address in your hosting account, but if unsure, contact technical support.
When you have established connectivity with your new host, locate the files you downloaded earlier, and upload them accordingly. Make sure to include the wp-config.php file in the root directory. If the upload is still running, move on to the next task as you can perform other activities simultaneously.
6. Import Your Database to the New Host
You can import the database while the file upload is in progress. Log in using the database administration tool provided by your new host, which we’ll assume is phpMyAdmin.
Once you’ve selected the database created earlier on the new host, click on the import tab.

Under File to import, browse for the file you exported by clicking on the Browse button.
Leave all the other options as default and scroll down to the bottom of the form and click on the Go button to commence the import. The time to complete importing the database will, of course, depend on the size of the files.
Upon completion of the import process, you’ll get a feedback notification.
Additional Option: When Switching & Changing URLs
In a scenario where you’re moving to a new host AND also changing your site’s URL, there is an additional step to be undertaken: replace the references to the old URL in your database with the new one.
In case you have your URL references scattered throughout several PHP scripts instead of being centralized, then you can use this Search Replace DB script for convenience. It functions as a Database Search and Replace Script in PHP and is available for free.
Once done, make sure to heed its warning NEVER to leave the script on the server.
7. Effect Changes to Your DNS Server
Your new server needs to point to your URL, which entails changing your DNS server settings. This process depends on where the domain of the URL was initially registered. If the domain was registered with your old hosting provider, then you’ll have to transfer the whole domain to your new provider. Customer service should be able to assist you with the transfer and prevent the DNS server not responding issue from ever happening.
However, if you purchased the domain from a domain registrar such as Domain.com, then your nameserver settings will have to be updated. Get the nameserver address of your new host, and connect this with your new domain. In case you aren’t familiar with them, nameserver addresses usually look something like this: ns1.yourhost.com, ns2.yourhost.com
Connect this nameserver address to your domain. The process will depend on where you purchased the domain. Below are instructions for usual cases:
- Domains Registered with GoDaddy
- Changing DNS Servers on HostGator
- How to Change Nameservers on Domain.com
Changes take up to 48 hours before they go into effect. To track when the process is complete, use tools like What’s My DNS. However, don’t make any modifications to your site until this process is done because you still be changing the old location instead of the new one.
As soon as the process is complete, migrations should be done without any downtime. Also, since both the old and new site essentially have the same content, users wouldn’t notice any difference.
Related Read: What is DNS
8. Perform Clean Up
Some housekeeping is in order once your DNS change has finally gone through. Go back to your old host, delete the database and all the files. Ideally, you should wait at least a week before doing this to ensure everything is working well.
In case you have to roll back the migration, keep copies of essential configuration files such as wp-config.php.
B. Switching Web Hosts Using WordPress Plugin
The manual process we’ve discussed so far can equally be done automatically, and much more easily with the help of plugins. Several options exist, but we’ll focus on the Duplicator plugin for this illustration.
1. Installation of the Duplicator Plugin
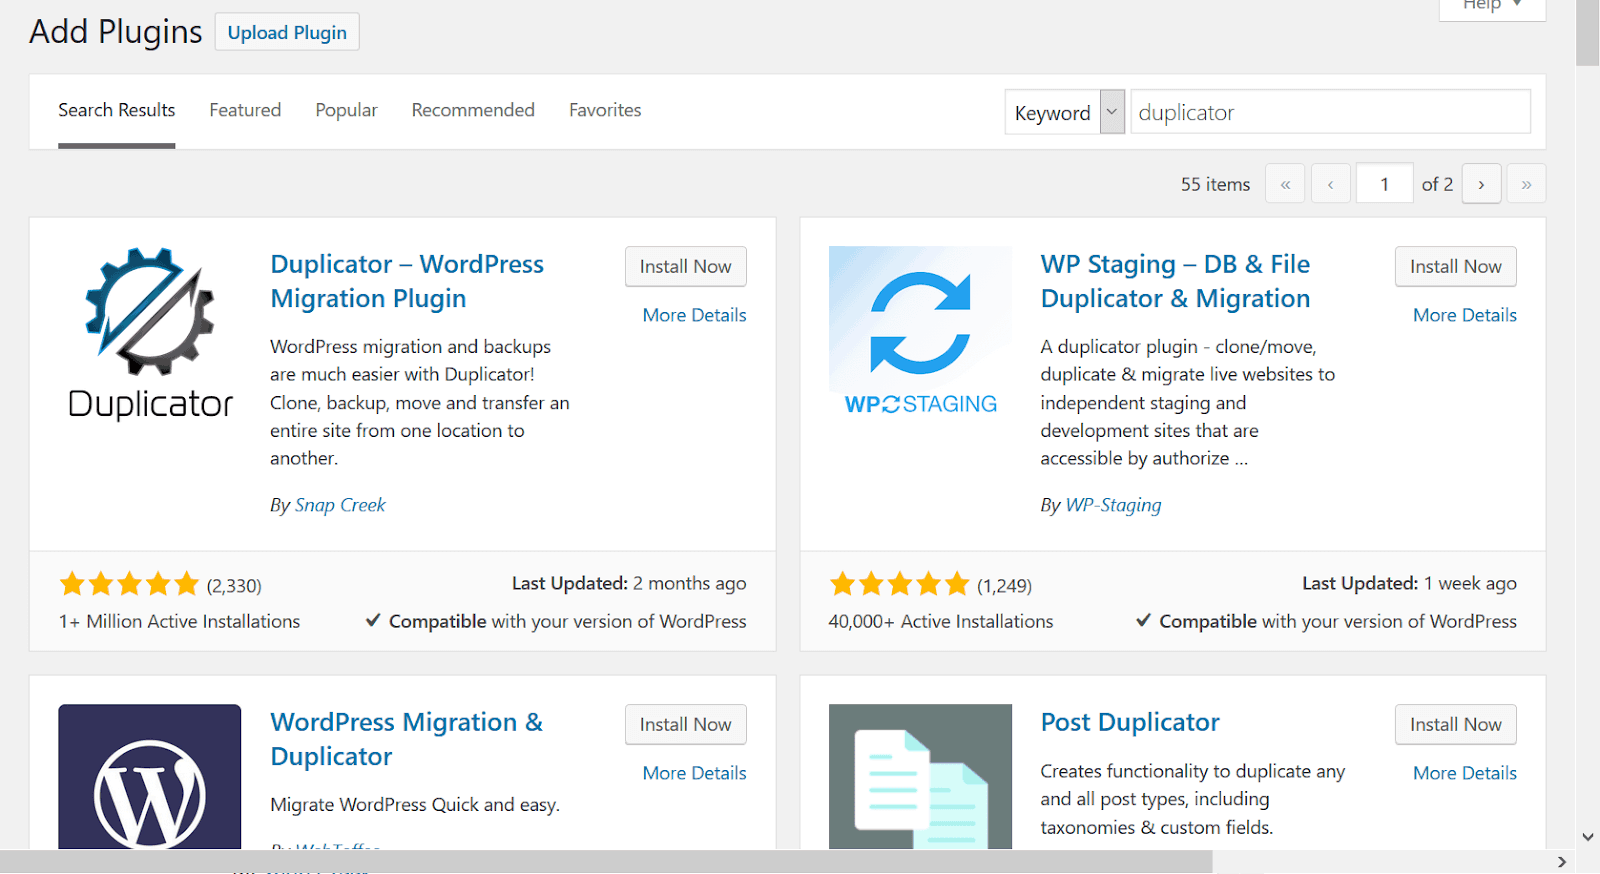
To install this plugin, you need to be logged into your WordPress website. Under the Dashboard, find the Plugins → Add New menu and search for Duplicator. Click on Install Now once the results return.
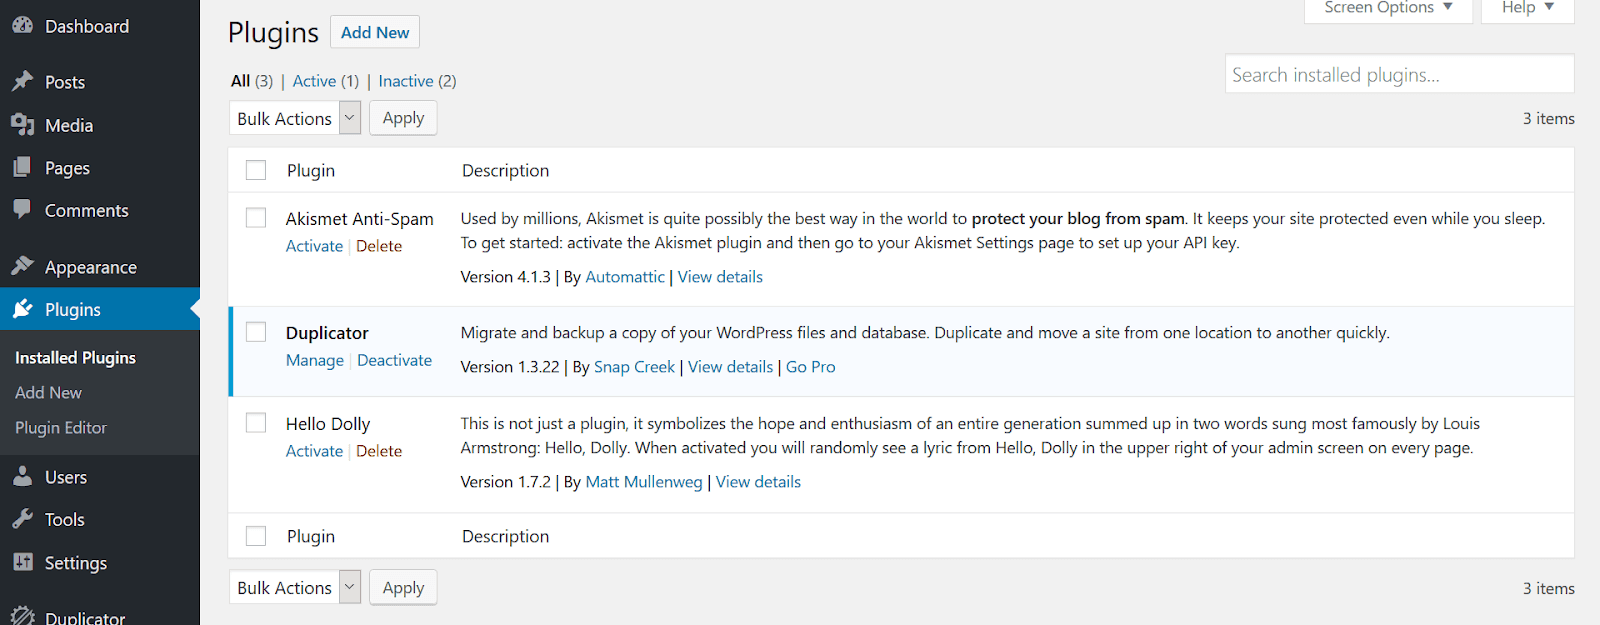
After WordPress has finished installing the plugin, click on the Activate button to start using it.
2. Next, Export the Existing Site
After activation, you should find the Duplicator plugin in your installed plugins’ work area. Click on the Manage option to initiate the next process.
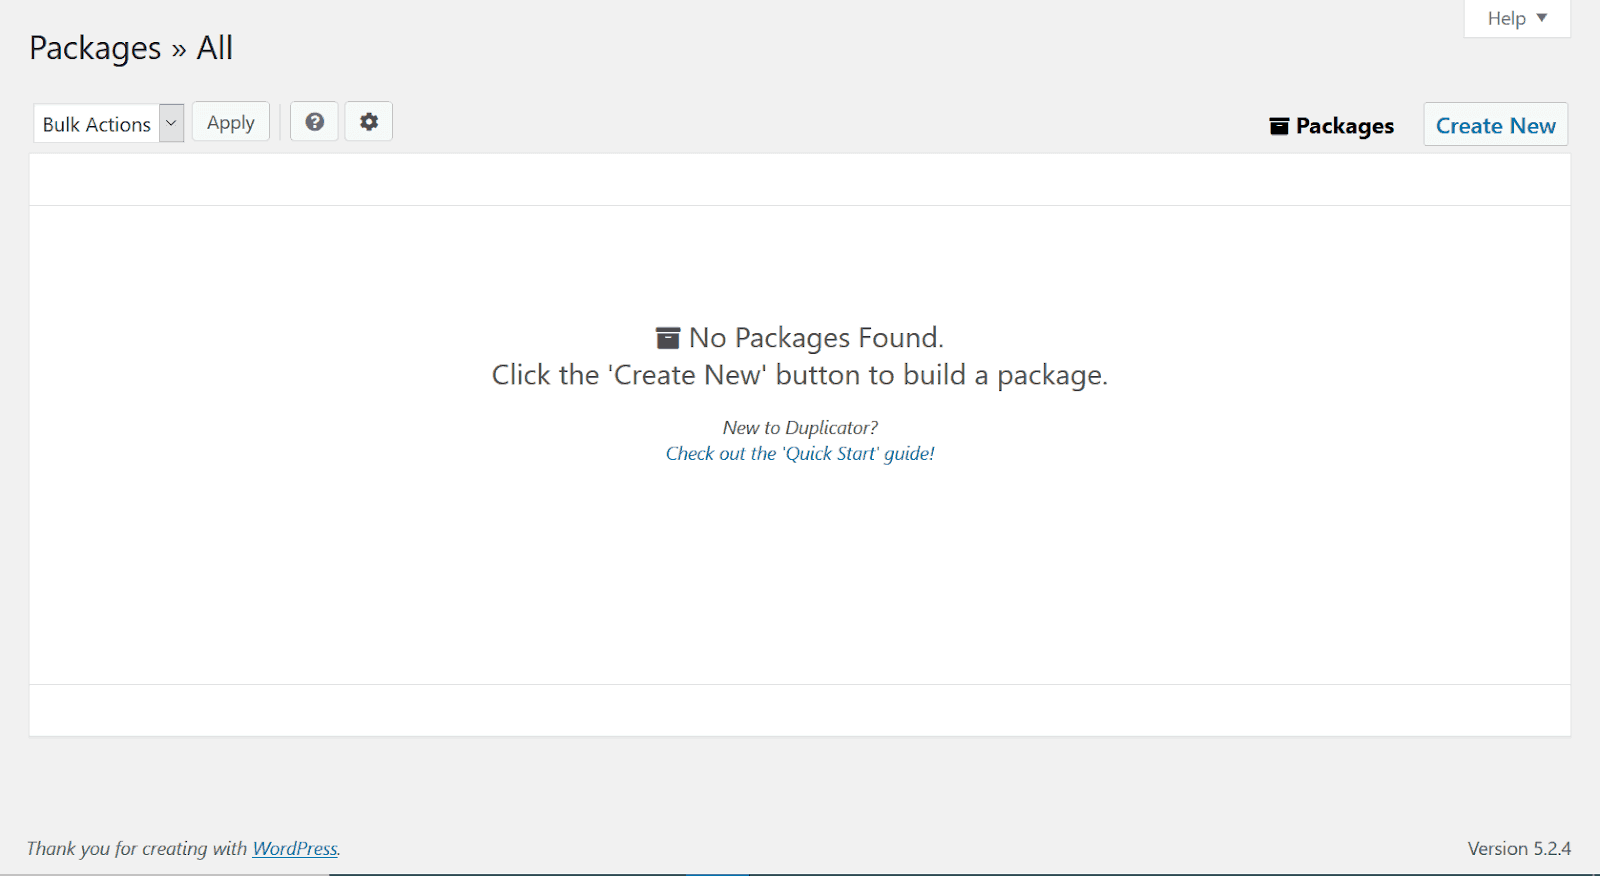
At this point, you haven’t yet created the packages it’s going to use. These packages are the compressed versions of your website and database. Click on the Create New button at the upper right-hand corner of the form to change this.
Three choices are presented:
- ☑️ Archive — Specify files and segments of the database for exclusion. Only do this if you have good reasons.
☑️ Installer — Allows you to fill in the database information of your new server’s environment.
☑️ Storage — Configure where to store your back-up. Unless you have purchased the pro-version of the Duplicator, the only option currently available is your server.
Click on the Next button when done. The plugin will perform a system check to ensure it has everything it needs to proceed. When the scan is complete and successful, you should see the following results:
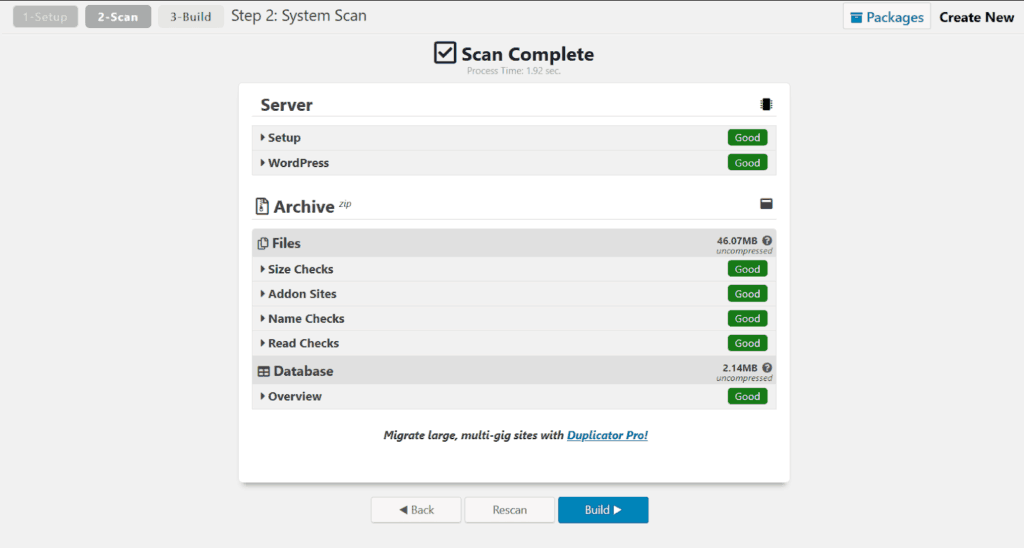
If you’re satisfied, commence the build process by clicking on the Build button.
The progress of the operation will be displayed. When completed, you should see this screen:
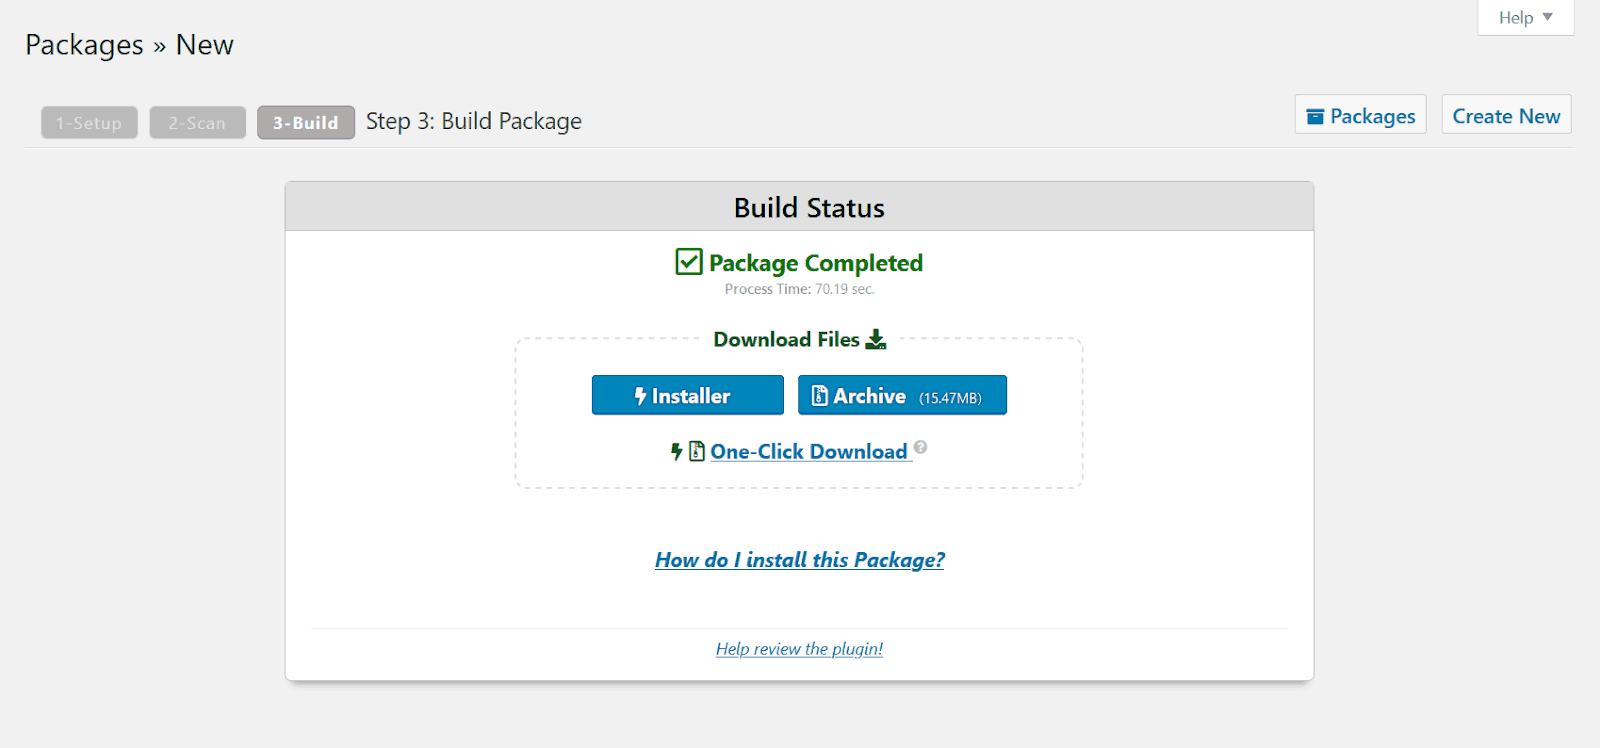
Download your archive and the installer individually, or all at once with the one-click download link. Congratulations, you’re done with exporting the existing site.
3. Upload Files Using FTP
Next, upload the downloaded files to the new host server via FTP by using its IP address instead of the domain.
Make sure the root directory of your site is empty. Upload both the installer and archive to the root directory.
4. Create a New Database
Like the earlier process, you’ll still need to create a database on your new host. Do so and make sure at least one user has full privileges to administer it. Note the version of MySQL server your host is providing and secure the database password in a safe location.
5. Establish Connectivity to the New Website
If using the same domain name as your previous site, you might run into some problems at this stage, because your domain is still pointing to your old site. Unlike the manual process where I recommended changing your DNS server settings, that solution would defeat the purpose of a faster migration, which using a plugin promotes.
Fortunately, there is a workaround by using your computer’s host file. It is possible to locally map domain names to specific IP addresses, enabling you to access files on the new server through the old domain.
(You can skip this section entirely if you’re using a new domain.)
Obtain the IP address of your new server from your service provider if you don’t have it.
How you open the host’s file is dependent on the OS platform, so here are some options:
- Windows — On the taskbar menu, search for “notepad.” It requires elevated privileges so right-click and choose “Run as administrator.” Use the editor to open c:\windows\system32\drivers\etc\hosts. Make sure you search for “All Files” to locate the file.
- Mac OS — Use the terminal app and enter the command sudo nano /etc/hosts, after which you’ll be prompted for your administrator password.
- Linux — Same method as with Mac OS.
After gaining access to the file, enter both the IP address of the new host and your sites domain name, to look like this:
![]()
Replace the placeholder yoursite.com with the real domain, and 192.165.1.10 with the actual IP address of your new host.
Note: the space separating the IP address and domain name in the example shown is a tab space.
Warning: Once you’ve completed the migration process, don’t forget to make sure you change the host file back to its original contents.
6. Start the Migration Process
Gird your loins because it’s time to start the migration in earnest. Navigate with your browser to http://yoursite.com/installer.php (substitute your actual domain.) By and large, you should see what amounts to this screen:
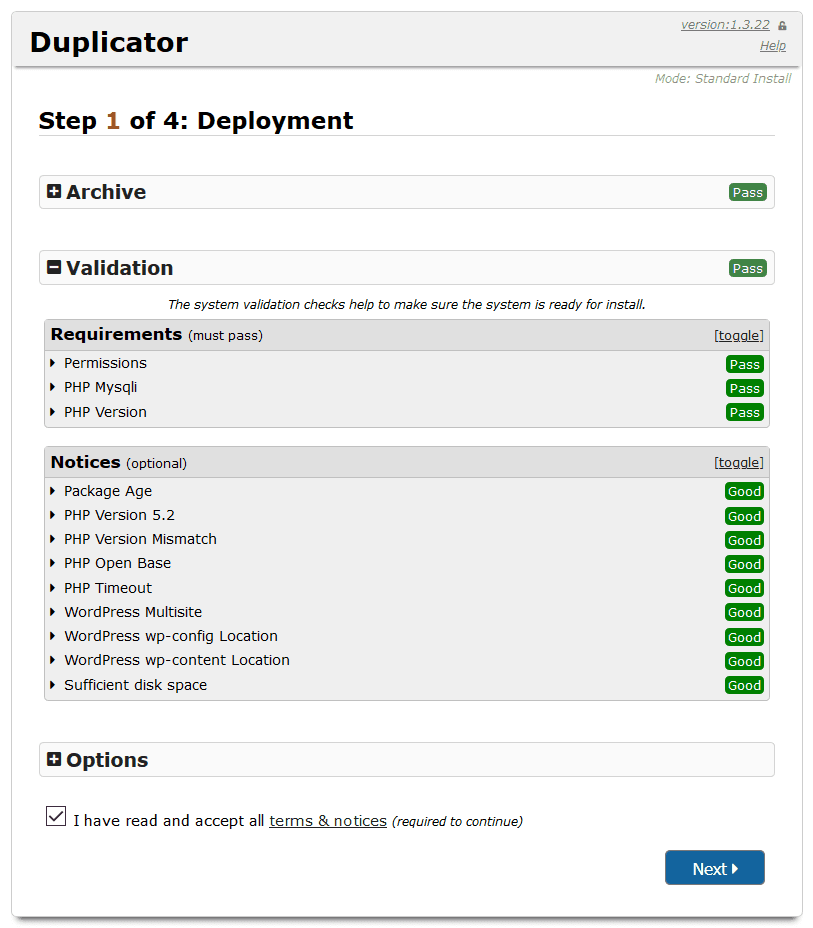
Ensure all validation checks are passed, especially those of archive and validation. Click the Next button to commence the deployment process.
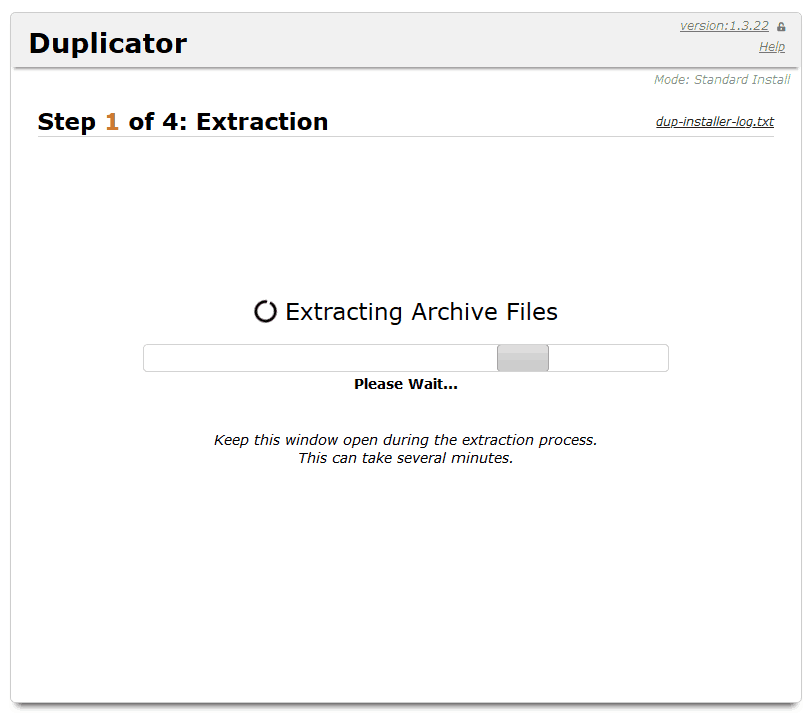
When it has completed file extraction, you’ll be brought to the next step requesting database identification and access credentials.
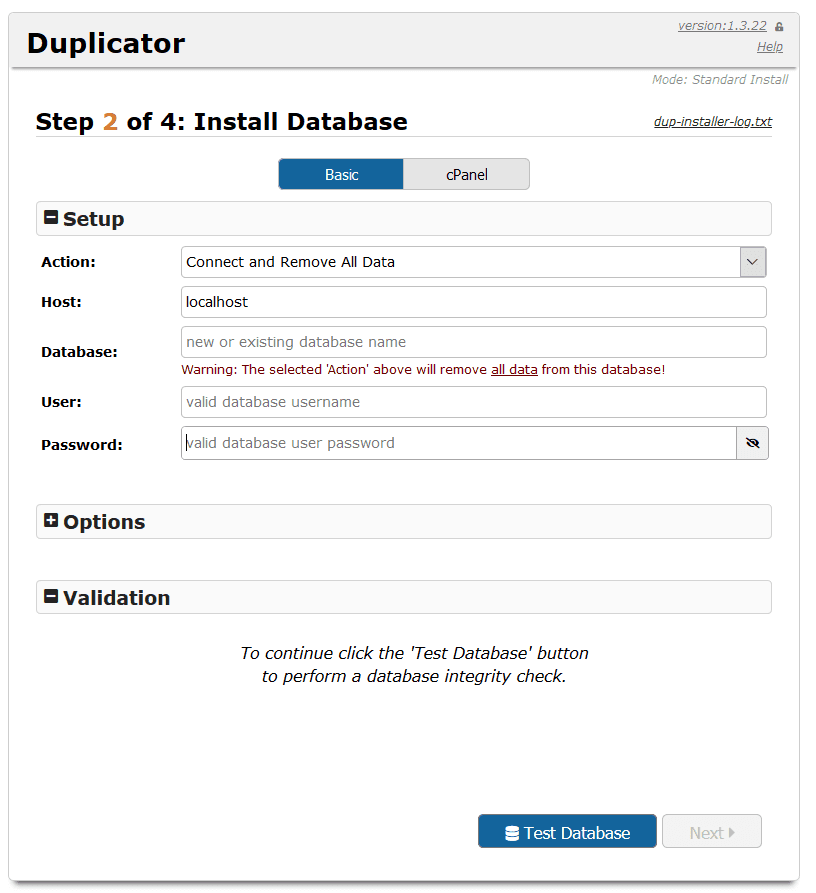
Enter the required database information, click on the Test Database button to makes sure everything is in order. If okay, click the Next button to begin importing the database.
The subsequent step will provide the opportunity to replace the former URL with the new one.
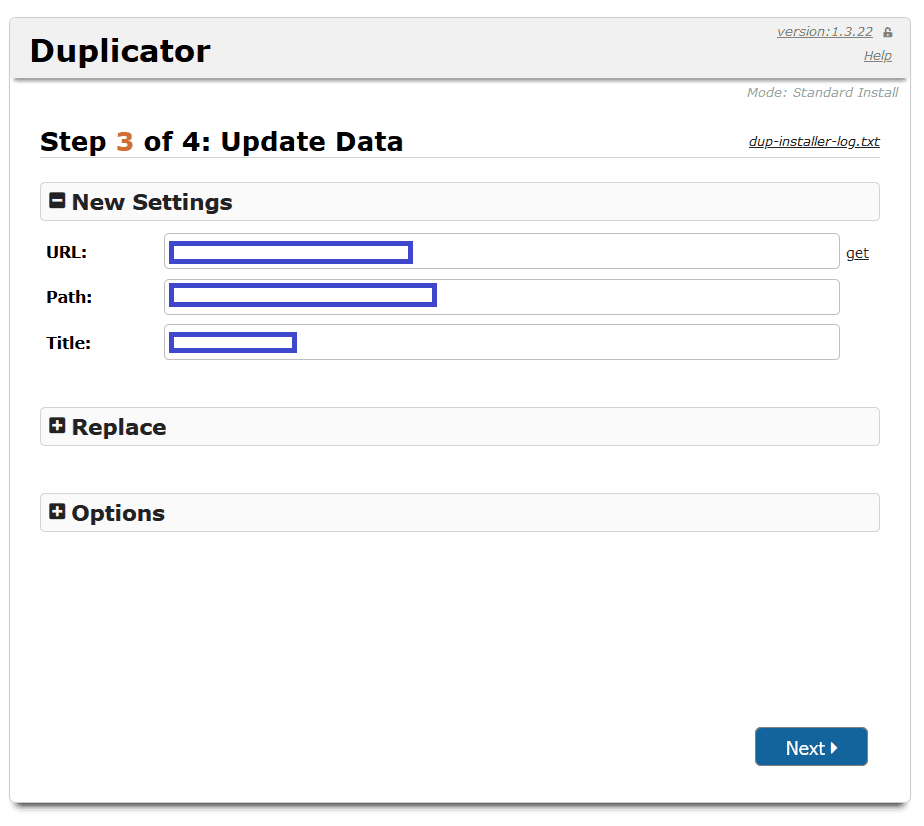
Click the Next button after you’re through to allow the plugin finalize the process, and see something similar to this:
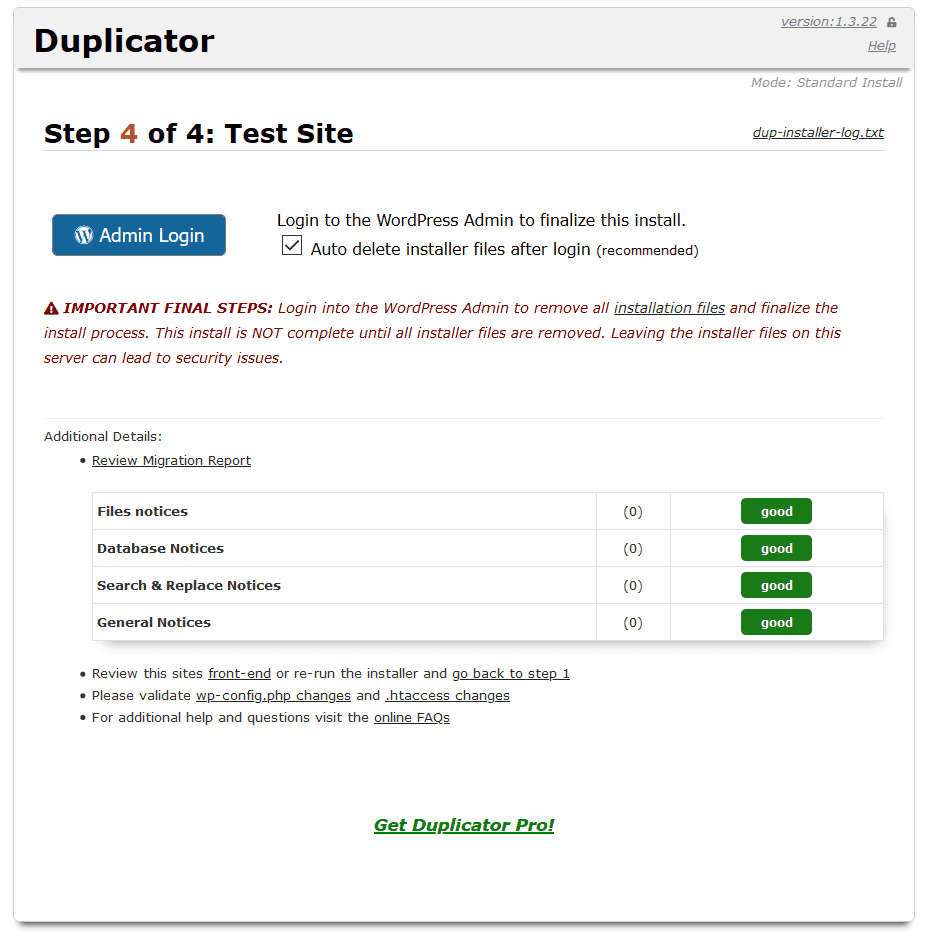
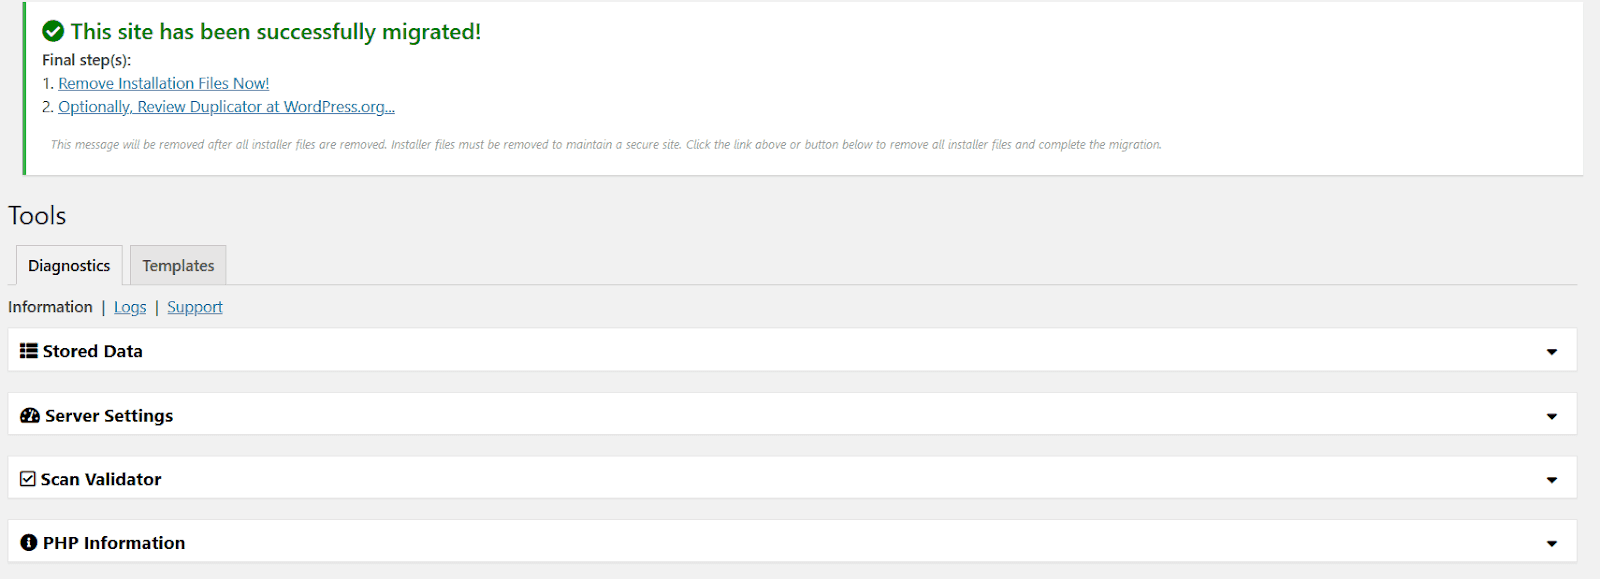
The screen reports whether everything went well and provides the opportunity to finalize the installation by providing a link to log into your site.
Follow the instructions, especially those about removing ALL installation files when done.
7. Finally, Update the DNS Nameserver
We’ve already discussed this step in detail, so you should refer back to that section. Just obtain the nameserver addresses from your new host, then connect them to your domain. As usual, wait until the change has taken effect before making any change to your site.
Well, congratulations are in order – you’ve just learned how to switch web hosts for your WordPress site. Awesome!
Related Reading: Error Establishing a Database Connection